 How to Make a Mountain Dew Soda Can Christmas Tree: The Ultimate Artificial Christmas Tree
(aka, How to Make the Mountain Dew Christmas Tree)
Have you seen the Mountain Dew Can Christmas Tree
making the rounds in
forwarded emails?
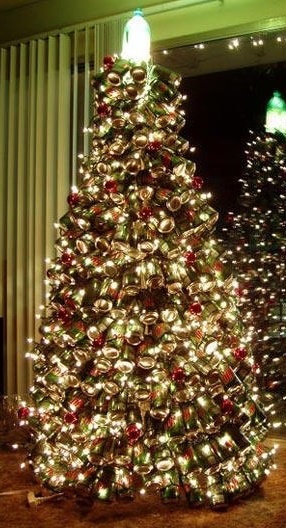
Looking at the photo of the illuminated tree at right, it looks beautiful...
and then you look at it more closely, to find it is made out of empty
Mountain Dew aluminum soda cans and coat hangers.
Wow! What can one say to this? Is it grotesque trailer-trash redneck culture? Or the ultimate re-use / recycling plan, an expression of transforming trash into functional art?
Would you like to make one yourself? Whether you like it or hate it, you have to admire it's creator's ingenuity, creativity and construction skills! I received these photos in an anonymous email, so if you know the first guy who made, let me know so I can give him credit for the idea.
Materials to make the tree are empty Mountain Dew soda cans, construction flags (or coat hangers or similar heavy gauge wire. The wire use to hold batted insulation between wall/ceiling studs would work, too. ) and PVC pipe.
How to make a Mountain Dew soda can Christmas tree.
(or "pop cans" if you live in the Midwest, or "Coke cans" if you live in the South!)
If you have any feedback, questions or improvements to suggest, write me !
Materials needed:
- Empty Mountain Dew soda cans (other green cans, Like Sprite would work, too, but the caffeine buzz from drinking the Mountain dew will definitely help you to finish this project!)
- Construction flags, coat hangers or similar heavy gauge wire. The
wire use to hold batted insulation between wall/ceiling studs would
work, too.
Decide how tall you want your tree to be. The taller it is, the more cans of Mountain dew and wires you'll need!)
How many cans will you need? |
|
|
Desired tree height *plus 8. (* add 8 inches to this for the base) |
Approximate number of both empty Mountain Dew cans and construction flag wires (obvious each can requires 1 wire) An extra dozen cans and wires is included, to fill bare spots. |
| 24 | 65 |
| 28 | 82 |
| 32 | 102 |
| 36 | 125 |
| 40 | 150 |
| 44 | 178 |
| 48 | 208 |
| 52 | 241 |
| 56 | 276 |
| 60 | 313 |
| 64 | 354 |
| 68 | 396 |
| 72 | 430 |
- Power drill with a 1/8 inch drill bit.
- PVC pipe (from Lowes, Home Depot, etc.) - 2 inch diameter, height from table above PLUS 8 inches (for the base)
- Pliers
- Silicone bathtub caulking cement (optional)
- Ordinary Christmas tree stand that will fit a 2 inch diameter trunk
How many days will it take
to get this many cans,
|
|||||||
| Minimum number of cans needed | 1 can/day | 2 cans/day | 3 cans/day | 4 cans/day | 6 cans/day | 12 cans/day | 24 cans/day |
| 65 | 65 | 32 | 22 | 16 | 11 | 5 | 3 |
| 82 | 82 | 41 | 27 | 21 | 14 | 7 | 3 |
| 102 | 102 | 51 | 34 | 26 | 17 | 9 | 4 |
| 125 | 125 | 63 | 42 | 31 | 21 | 10 | 5 |
| 150 | 150 | 75 | 50 | 38 | 25 | 13 | 6 |
| 178 | 178 | 89 | 59 | 44 | 30 | 15 | 7 |
| 208 | 208 | 104 | 69 | 52 | 35 | 17 | 9 |
| 241 | 241 | 120 | 80 | 60 | 40 | 20 | 10 |
| 276 | 276 | 138 | 92 | 69 | 46 | 23 | 11 |
| 313 | 313 | 157 | 104 | 78 | 52 | 26 | 13 |
| 354 | 354 | 177 | 118 | 88 | 59 | 29 | 15 |
| 396 | 396 | 198 | 132 | 99 | 66 | 33 | 17 |
| 430 | 430 | 215 | 143 | 107 | 72 | 36 | 18 |
Directions to make the soda can Christmas tree:
Step 1. Drill holes for the wires in the PVC pipe.
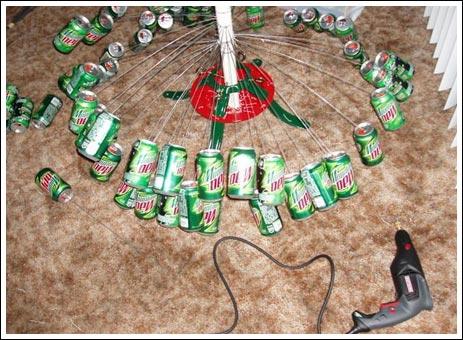
You will need to use a spiral pattern, turning the pipe as you drill. Each full revolution should equal 4 inches of height. the spacing does NOT need to be precise, as long as you have the total number of required holes within each 4 inch length of pipe.
This table will help you drill. O inches represents one end of the pipe that will become the top of the tree. Whatever height tree, you choose to make, stop drilling at that number of inches minus 8! You will leave the last 8 inches (as the bottom trunk of the tree) bare and therefore undrilled. Each drilled hole will receive the end of a wire for a can.
Where to drill the holes and how many |
|
| Inches from one end of the pipe | Number of holes to drill in the next 4 inches |
| 0 | 0 |
| 4 | 3 |
| 8 | 5 |
| 12 | 8 |
| 16 | 10 |
| 20 | 13 |
| 24 | 15 |
| 28 | 18 |
| 32 | 20 |
| 36 | 23 |
| 40 | 25 |
| 44 | 28 |
| 48 | 30 |
| 52 | 33 |
| 56 | 35 |
| 60 | 38 |
| 64 | 40 |
| 68 | 43 |
| 72 | 45 |
Step 2 - Prepare the wires or coat hangers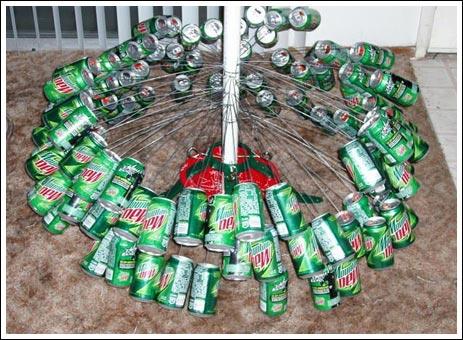
Clip the construction flags, coat hangers or heavy gauge wires to the lengths specified in the table below. Be SURE to keep these wires sorted. You will assemble them in order, from longest to shortest!
| Where to insert the wires - Inches from one end of the pipe | Number of wires to cut to this length | Length of wires for these holes |
| 1 | 3 | 3 |
| 4 | 4 | 4 |
| 8 | 5 | 4 |
| 12 | 8 | 5 |
| 16 | 10 | 6 |
| 20 | 13 | 7 |
| 24 | 15 | 8 |
| 28 | 18 | 9 |
| 32 | 20 | 10 |
| 36 | 23 | 11 |
| 40 | 25 | 12 |
| 44 | 28 | 13 |
| 48 | 30 | 14 |
| 52 | 33 | 15 |
| 56 | 35 | 16 |
| 60 | 38 | 17 |
| 64 | 40 | 18 |
| 68 | 43 | 19 |
| 72 | 45 | 20 |
Step 3 - Bend the wires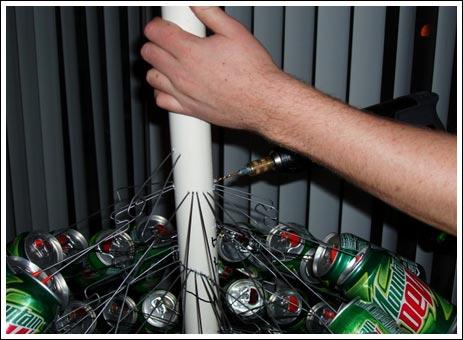
Bend the last 3/4 inch of both ends of each wire to a right angle (L shape).
The is what will help to hold the wires in the can and pipe. For a permanent attachment, you can also put a dap of silicone cement (like bathtub caulking) on each end, as you insert them.
Step 4 - Put the pipe into your tree stand
Insert the end of the PVC pipe with the 8 inches of undrilled area into your Christmas tree stand and tighten it.
No water is needed.
This guy drilled as he assembled.
I wouldn't recommend this approach.
It ought to be safer and easier to lay the PVC pipe on the ground (outside, or with a board underneath, to protect your floor!) and pre-drill the holes.
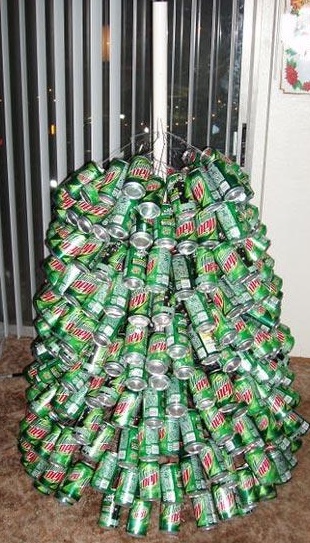
Step 5 - Start hanging the cans
Starting at the bottom, insert the longest wires into the holes and attach a Mountain Dew can to the other end of each! Just work your way up the tree, using the wires from longest to shortest.
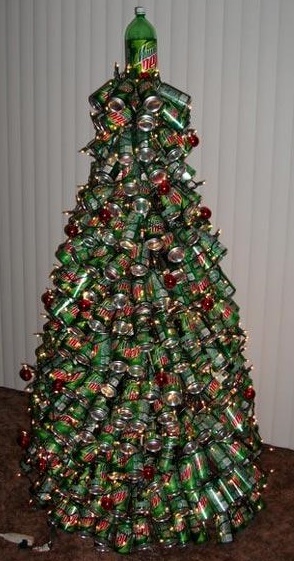 Step 6 - Topping the tree.
He used an empty 2 or 3 liter plastic Mountain dew bottle, right side up, with a hole cut in the bottom (probably with a serrated kitchen knife) and inserted a 25 watt appliance light bulk or a 11 watt compact fluorescent bulb in it.
Step 7 - Decorating the tree
Once the tree is assembled, you can decorate it. The cans are naturally reflective, so you really just need to wrap Christmas lights around the outside, from bottom to top (or start at the top and run the cord up the PVC pipe).
Then hang ornaments on the light wires.
Step
8 - A tree topper 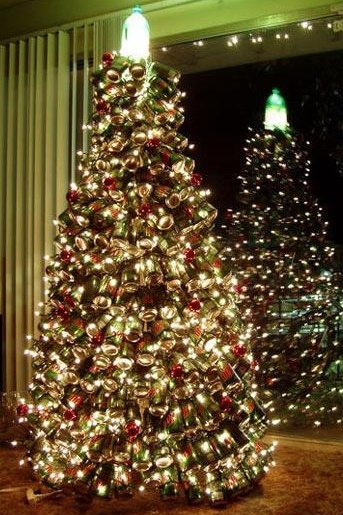
You can use a 2 liter Mountain Dew
bottle as a tree topper, just cut a hole or slit in the bottom and
you can put a light in it, too! If you are really creative,
you could make a Mountain Dew bottle angel or star!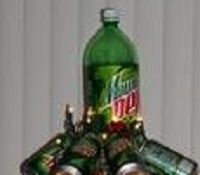
Find Other types of farms:
- Farm markets and roadside stands
- Road trips and camping resources
- Home canning supplies at the best prices on the internet!
- Maple Syrup Farms, sugarworks, maple syrup festivals
- Environmental information and resources
- Consumer fraud and scams information
- Farms For Your Event for birthday parties, weddings, receptions, business meetings, retreats, etc.
- Pick Your Own fruits and vegetable farms
- Festivals - local fruit and vegetable festivals
- Local Honey, apiaries, beekeepers
- Local Meat, Milk and Eggs
Get the
most recent version of
the Ball Blue Book